Shiny surfaces: I tried this with greaseproof paper but it proved too flimsy, so I cut a hole in the bottom of a translucent plastic container. The hole was too big.
1. Silver Tray: strong directional sunlight from a window. Yes, I have fair hair and arthritic fingers.
2. Silver Tray: with the diffusing bucket - a horrible milky appearance and still the camera reflection because of the big hole. Lighting the same as in 1.
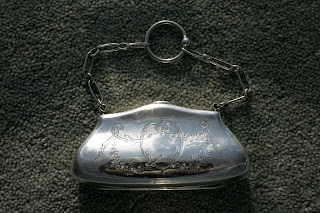
3. Silver Purse: the specular reflections have caused under-exposure. Heavy shadows evident.
4. Silver Purse: with diffuser the object is seen better and the shadows reduced.
5. Scent Bottle: strong sunlight has transmitted blue to the background.
6. Scent Bottle: with diffuser, the bleed of blue light has all but been eliminated, and the detail in the silver improved.
7. LLSBA Paperweight: directional light gives good contrast to the engraving, but specular reflections are a nuisance.
8. LLSBA Paperweight: the diffuser has completely flattened the contrast, and the image is worse.
9. LLSBA Paperweight: reducing the exposure improves the contrast, and the specular reflections are less evident.
10. Glass Bowl: direct light shows some detail in the shadows.
11. Glass Bowl: with diffusion, the contrast has gone and a flat image with poor detail results.
Conclusion: Whilst the application of a "light tent" can improve images of some shiny objects, it doesn't work for everything. A professionally made tent with pure white even illumination would probably give better results, but to some extent, it's trial and error.


No comments:
Post a Comment